Using a dynamic filter (Video - 5:36)
Overview
When you need the ability to provide filter criteria at print-time, you can use the Database Connection Setup dialog to create a query prompt that appears each time the document is printed, allowing the user to enter criteria for a database search. Only records that match the entered text will be printed.
Query prompts are useful when you want the print operator to be able to print specific filtered records "on the fly." For example, suppose you run a shipping company where you want to give the print operator the ability to print shipping labels based on the city of the recipient. To do this, you would use the Filter property page of the Database Setup dialog to create a filter condition where the "City" field from the database equals a query prompt. At print-time, a query prompt dialog is then displayed, allowing the print operator to enter the city name. Only records containing City fields that equal the name of the entered city will be printed.
For more information on filters and query prompts please review the following resources:
Filtering Data Using a Query Prompt
Applicable to
BarTender 2019 and later
Information
Creating a dynamic filter
If you aren't familiar with filtering data in BarTender, then you will want to review the support articles Introduction to selecting records and Using a basic filter.
DownloadsSample.xlsx
- Place Sample.xlsx in C:\Database Filter\
- Create a new BarTender document and create a database connection to Sample.xlsx. Please review Getting started with database connections for help creating the database connection.
- Click File > Database Connection Setup
- Select Filter
- You should now see all the data since a filter has not been added yet

- Click the
 icon to add a filter condition
 - Click
 to enable the drop-down menu option
 - Click
 and select New Query Prompt..
- For the purpose of this example, leave the default settings and click OK

- Click Ok to close Database Setup
- Remember to save your label
Testing the Query Prompt
You should test your Query Prompt to make sure you get the expected results.
- Click File > Database Connection Setup
- Click Filter
- Click Apply Filter

- The Query Prompt should pop up. Enter Seattle and click OK

- You should get all the Seattle records

- If you want to see all records you can click Apply Filter again, and then click Cancel
- Click OK to close Database Setup
- Add three single-line text objects and set the datasources to the each of the database fields: City, Distributor, and Part Number

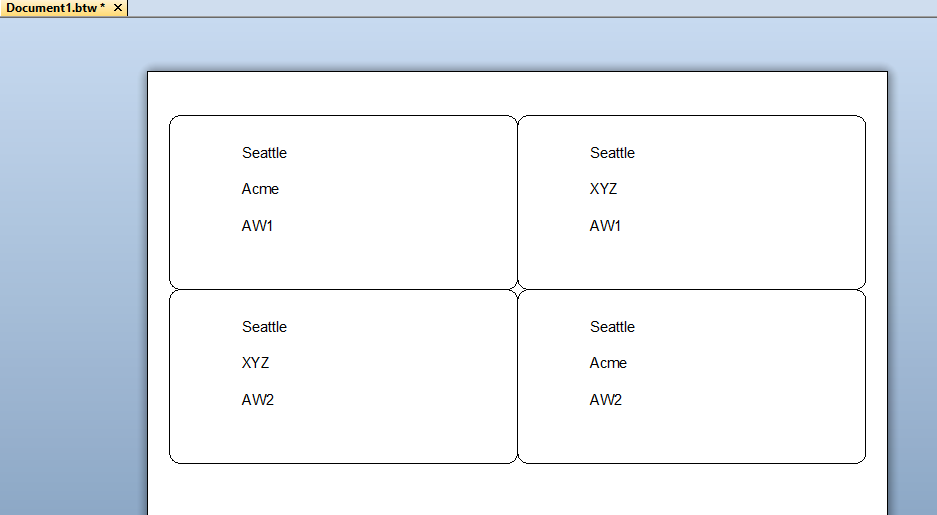
- Your label should look similar to this

- Click File > Print Preview
- Enter Munich in the Query Prompt
- You should have four labels in your print preview

Selecting records to print after Query Prompt
You can use the Query Prompt as a filter, and choose specific records to print after the filter records are returned.
- Click File > Print
- Set Queried Records to Selected at Print Time

- Click Print Preview
- Enter Munich in the Query Prompt, then click Next
- You can now choose which of the Munich records to print. Uncheck the boxes next to records 3 and 4.

- Click Preview
- Now you should only have two labels in your print preview

Link query to a form control
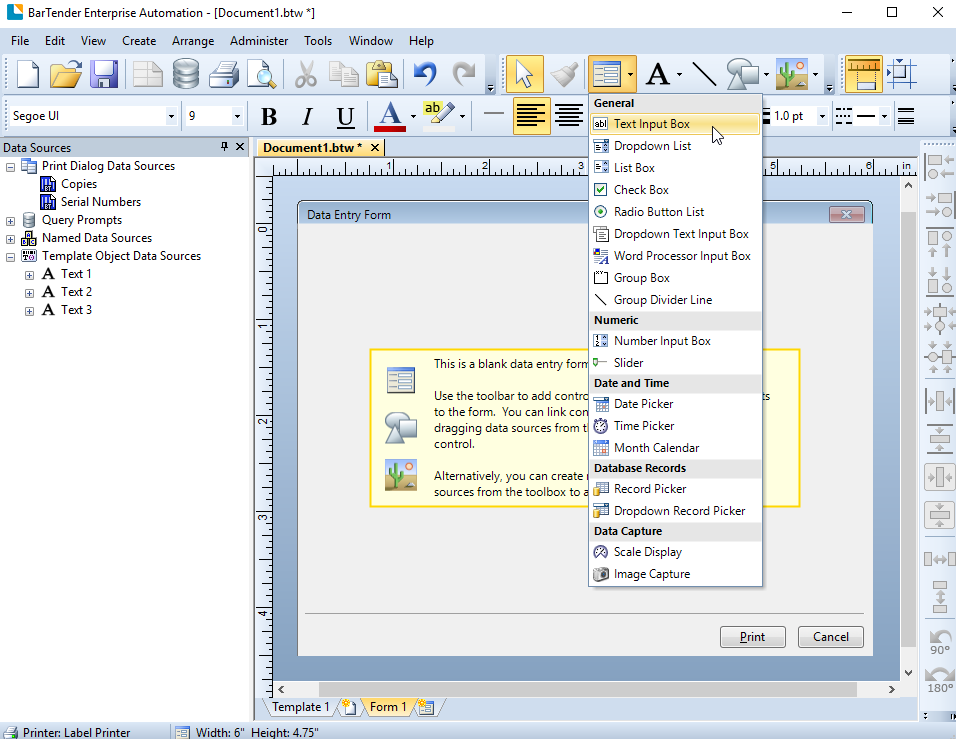
A query can be linked to any form control. Linking a query to a form control is the same process regardless of which form control type is used. This example will show how to link a query to a text input box.
- Add a Text Input Box to the form

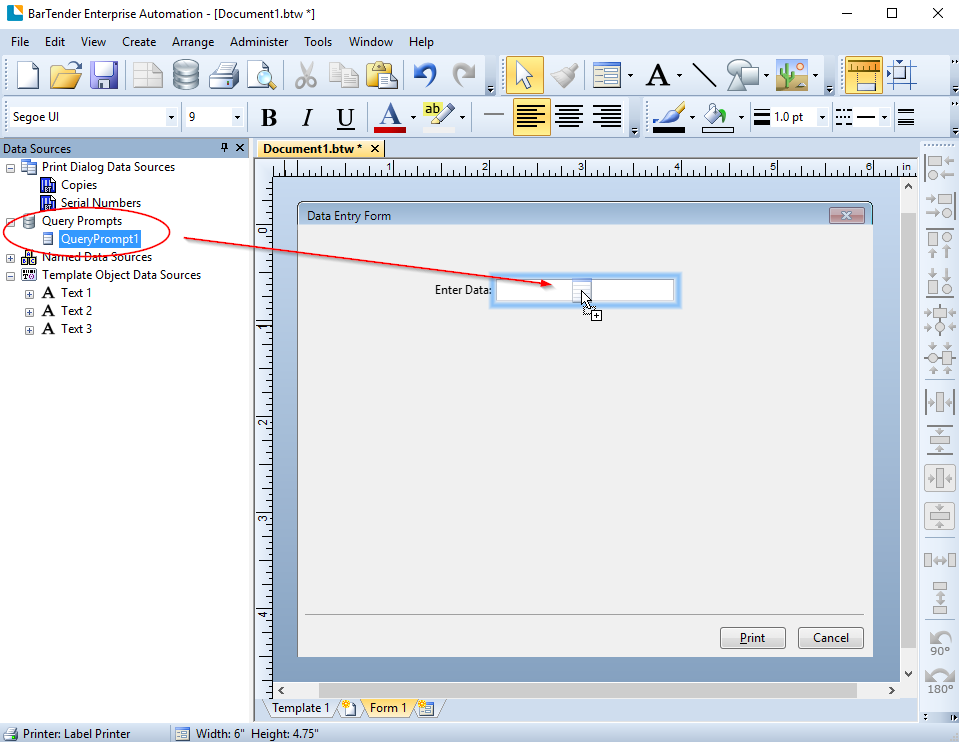
- Expand Query Prompts in the Data Sources toolbox and drag QueryPrompt1 onto the Text Input Box

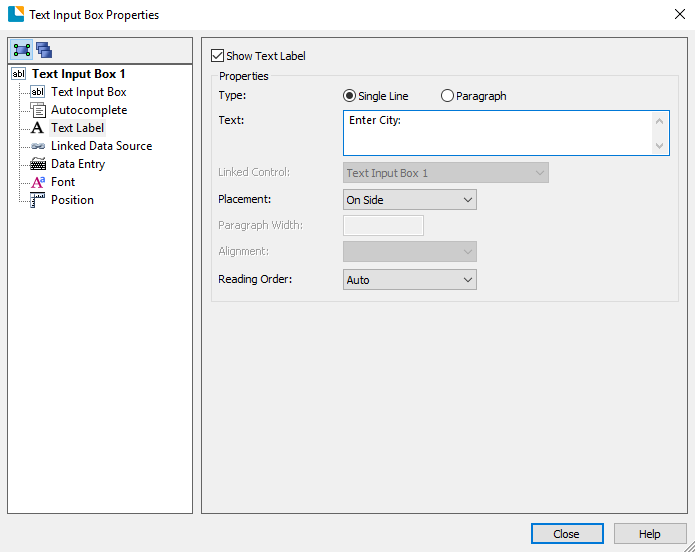
- Open the Text Input Box Properties (Right click > Properties) and select Text Label on the left. Change the text from Enter Data: to Enter City:

- Click Close to close the Text Input Box Properties
- You have now linked your query prompt to a text input box on your data entry form
- Click File > Print Preview
- Enter Seattle
- All Seattle records are printed

